DIY: How to prepare different types of floors for tiling
Preparation is the first step to a lasting and quality job. Follow this guide to priming and preparing different floor substrates before tiling.
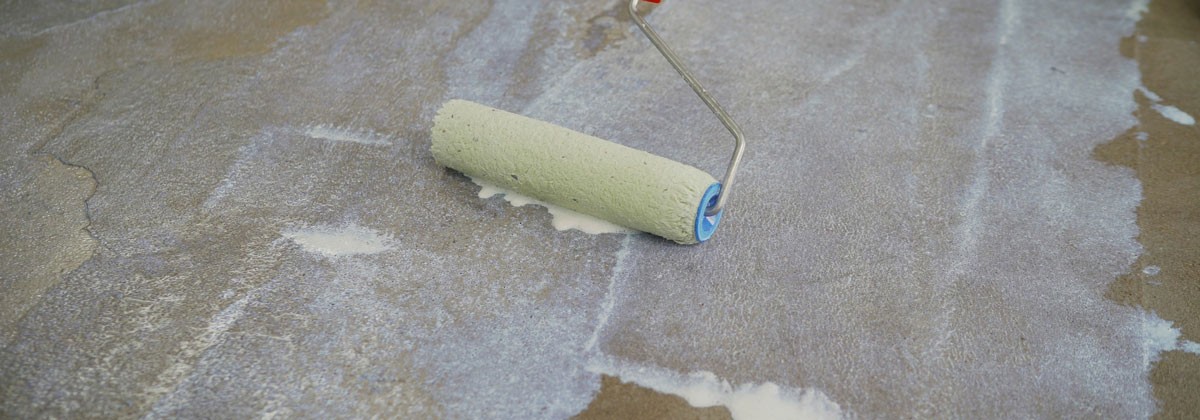
Before you start levelling or tiling, the floor will need to be primed. Not all substrates are made equal. Cement will require a slightly different preparation to say, for instance, wooden floorboards. Follow this guide for the right way to prepare different substrates before laying floor tiles.
The benefits of priming before tiling:
- It improves the bond between the tile adhesive and the substrate, and is particularly good to strengthen flaky or friable surfaces
- Priming reduces the risk of chemical reactions that may occur between a cement base and certain tile adhesives
- It reduces porosity of the substrate and the chance of pinholes (air bubbles) forming in a waterproofing membrane or when laying levelling compound.
How to prepare sand and cement screed floors for tiling
Products to use
- Tilers Primer
- Rapid-Flex or LT-33 Rapid-Set adhesive
- Grout with Arc Flexi-Grout or Arc Wall & Floor Grout
How it’s done
- New sand and cement screed must be left for a minimum of four weeks to dry sufficiently.
- Remove any loose or flaking layers and ensure the surface is free of any contaminants, loose dust or dirt.
- Prime the screed with Arc Tilers Primer diluted 3 parts water to 1 part primer and allow to dry.
- Very porous screeds may require more than one coat of primer.
- Level the floor with a levelling compound if necessary and allow to dry thoroughly.
How to prepare concrete base floors for tiling
Products to use
- Tilers Primer
- Rapid-Flex or LT-33 Rapid-Set adhesive
- Arc Flexi-Grout or Arc Wall & Floor Grout
How it’s done
- New concrete must be allowed to dry for a minimum of six weeks.
- Allow 1 day per mm for an overall depth of 50mm and 2 days per mm for any depth greater then 50mm.
- Remove any laitance (the fine residue that builds up on fresh concrete) from the surface and ensure it is free of any contaminants, loose dust or dirt.
- Prime the base with Arc Tilers Primer diluted 3 parts water to 1 part primer and allow to dry. Very porous concrete may require more than one coat.
How to prepare an anhydrite screed base for tiling
Products to use
- Tilers Primer
How it's done
- Anhydrite screed must be confirmed dry by taking consistent moisture readings. The residual moisture content must be less than 0.5%.
- Remove any laitance from the surface and make sure it is free of contaminants, loose dust or dirt.
- Prime with two coats of Arc Tilers Primer, the first diluted 3 parts water to 1 part primer followed by a neat coat.
- Allow to dry between coats.
How to prepare flooring-grade asphalt and bitumen for tiling
Products to use
- Arc Tilers Primer slurry coat
- Rapid-Flex or LT-33 Rapid-Set adhesive
- Arc Flexi-Grout or Arc Wall & Floor Grout
How it’s done
- Remove any surface contamination, loose dust or dirt and ensure there are no signs of debonding or hollowness.
- Prime the surface with Arc Tilers Primer diluted 1 part water to 1 part primer mixed with 1 part adhesive to form a brush-on slurry.
- Allow to dry before tiling.
How to prepare to tile over existing tiles
Products to use
- Arc Tilers Primer slurry coat
- Rapid-Flex or LT-33 Rapid-Set adhesive
- Arc Flexi-Grout or Arc Wall & Floor Grout
How it’s done
- Ensure existing tiles are firmly bonded to the original substrate.
- Remove any loose tiles and make good.
- Remove any surface contamination, loose dust or dirt.
- Prime the existing tiles with Arc Tilers Primer diluted 1 part water to 1 part primer mixed with 1 part adhesive to form a brush on slurry.
- Allow to dry before tiling.
Preparing to tile over existing vinyl tiles or vinyl sheets
Products to use
- Arc Tilers Primer slurry coat
- Rapid-Flex or LT-33 Rapid-Set adhesive
- Arc Flexi-Grout or Arc Wall & Floor Grout
How it’s done
- Ensure existing vinyl is firmly bonded to the original substrate.
- Remove any loose vinyl tiles and make good.
- Remove any surface contamination, loose dust or dirt.
- Prime the existing vinyl with Arc Tilers Primer diluted 1 part water to 1 part primer mixed with 1 part adhesive to form a brush on slurry.
- Allow to dry thoroughly before tiling.
Tiling preparation for tongue-and-groove floorboards using plywood overlay
Products to use
- Tilers Primer
- Rapid-Flex or LT-33 Rapid-Set adhesive
- Arc Flexi-Grout or Arc Wall & Floor Grout
How it’s done
- Plywood must be exterior grade and a minimum of 15mm.
- Stagger the joints when fixing the plywood, leaving a 0.5mm to 1mm gap between boards.
- Plywood must be screwed, not nailed, at 150mm centres.
- Remove any surface contamination, loose dust or dirt.
- Prime the plywood with Arc Tilers Primer diluted 3 parts water to 1 part primer and allow to dry.
Tiling preparation for tongue-and-groove floorboards using Plastic Ply overlay
Products to use
- Tilers Primer
- Plastic Ply
- Rapid-Flex or LT-33 Rapid-Set adhesive
- Arc Flexi-Grout or Arc Wall & Floor Grout
How it’s done
- Remove any surface contamination, loose dust or dirt.
- Prime the floorboards with Arc Tilers Primer diluted 3 parts water to 1 part primer and allow to dry.
- Apply the self-adhesive Plastic Ply in a brick type pattern.
- Apply tile adhesive ensuring all voids are filled.
Tiling preparation for tile backer boards on timber floors
Products to use
- Tiler’s Primer
- Rapid-Flex or LT-33 Rapid-Set adhesive
- Tile backer board
- Jointing tape
- Arc Flexi-Grout or Arc Wall & Floor Grout
How it’s done
- Remove any surface contamination, loose dust or dirt.
- Prime the timber floor with Arc Tilers Primer diluted 3 parts water to 1 part primer and allow to dry.
- Fix the backer boards with a thin 3 to 6mm bed of adhesive.
- Screw fix the boards at 300mm centres.
- Use jointing tape to reinforce joints.
Tiling preparation for tile backer boards on concrete floors
Products to use
- Tilers Primer
- Rapid-Flex or LT-33 Rapid-Set adhesive
- Backer boards
- Jointing tape
- Arc Flexi-Grout or Arc Wall & Floor Grout
How it’s done
- Remove any surface contamination, loose dust or dirt.
- New concrete must be allowed a minimum of six weeks’ drying time.
- Prime the concrete floor with Arc Tilers Primer diluted 3 parts water to 1 part primer and allow to dry.
- Fix the backer boards with a thin 3mm to 6mm bed of adhesive, ensuring full-surface bonding.
- Use jointing tape to reinforce joints.
Tiling preparation for floors with electric underfloor heating
Products to use
- Tiler’s Primer
- Rapid-Flex or Rapid LT-33B adhesive
- Tile backer board
- Flexible levelling compound
- Underfloor heating
- Arc Flexi-Grout or Arc Wall & Floor Grout
How it’s done
- Ensure existing substrate is firm, stable and in good condition.
- Remove any surface contamination, loose dust or dirt.
- Prime the concrete floor with Arc Tilers Primer diluted 3 parts water to 1 part primer and allow to dry.
- Fix the backer boards with a thin 3mm to 6mm bed of adhesive.
- Ensure the underfloor heating element / mat is taped down to the substrate.
- Embed the underfloor heating element using flexible levelling compound.
- Once cured, tile using Rapid-Flex or Rapid Lt-33 adhesive.
- Once complete, allow seven days before switching the heating on, initially at a low temperature and then increase the temperature gradually by 5°C each day.
Tiling preparation for floors with heated screeds
Products to use
- Tilers Primer
- Flexible levelling compound (if needed)
- Rapid-Flex or LT-33 Rapid-Set adhesive
- Arc Flexi-Grout or Arc Wall & Floor Grout
How it’s done
- New sand/cement screeds must be left for a minimum of four weeks to dry sufficiently.
- The cured screed should be heated gradually, no more than 5°C per day, to a maximum of 25°C and then maintain that temperature for 3 days before allowing it to cool down to room temperature.
- Turn off the heating 24 hours prior to tiling, or in cold weather reduce to below 15°C.
- Remove any loose, flaking layers and ensure the surface is free from any contaminants, loose dust or dirt.
- Prime the screed with Arc Tilers Primer diluted 3 parts water to 1 part primer and allow to dry.
- Very porous screeds may require more than one coat.
- Once tiling is completed, allow seven days before gradually increasing the temperature of the heating.
Tiling preparation of floors using decoupling membrane
Products to use
- Tilers Primer
- Rapid-Flex or LT-33 Rapid-Set adhesive
- Decoupling membrane
- Arc Flexi-Grout or Arc Wall & Floor Grout
How it’s done
- Ensure the original substrate is firm, stable and in good condition.
- Remove any loose flaking layers and ensure the surface is free from any contaminants, loose dust or dirt.
- Prime the substrate with Arc Tilers Primer diluted 3 parts water to 1 part primer and allow to dry.
- Apply a thin 3mm to 6mm bed of adhesive and lay the decoupling membrane while the adhesive is still moist.
- Allow the adhesive to cure before tiling.
In the same category
- DIY: How to tank a wet room and prevent leaks from the get-go
- Buyer's guide to underfloor heating: your cosy home starts here
- How to measure walls and floors correctly for tiles and wood floors
- DIY: How to prepare different types of walls for tiling
- DIY: Getting started with the basics of preparing surfaces for tiling


