DIY: How to install electric underfloor heating
Electric underfloor heating is effective, efficient and relatively easy to install under tiles, carpets and wood flooring. Here's how to DIY your heated floors.
Electric underfloor heating is relatively quick and easy to install if you’re a competent DIYer, but you’ll still need a certified electrician to attach the heating system to the thermostat.
The fundamentals are the same in laying an electric underfloor heating system beneath tiles, carpets or wood flooring, however the exact installation steps depend on the floor you choose. For tiles, you'll need the Warmup StickyMat system, while the Warmup Foil Heater is designed for laminated floors and carpets.
There are, however, some universal steps for both systems.
5 Essentials when installing underfloor heating...
- Remember the golden rule: Read the instructions first.
- Work out the exact amount of heating mat you need by measuring the floor area where you’re laying the system. Electric underfloor heating systems can’t be placed under fixtures such as baths, cookers and counters, so you’ll have to subtract these spaces from your calculation.
- Next, prepare your working surface by sweeping and cleaning the floor. Then mark out the placement of the fixtures on the floor with pencil.
- Use a multimeter to test both types of matting before, during, and after installation.
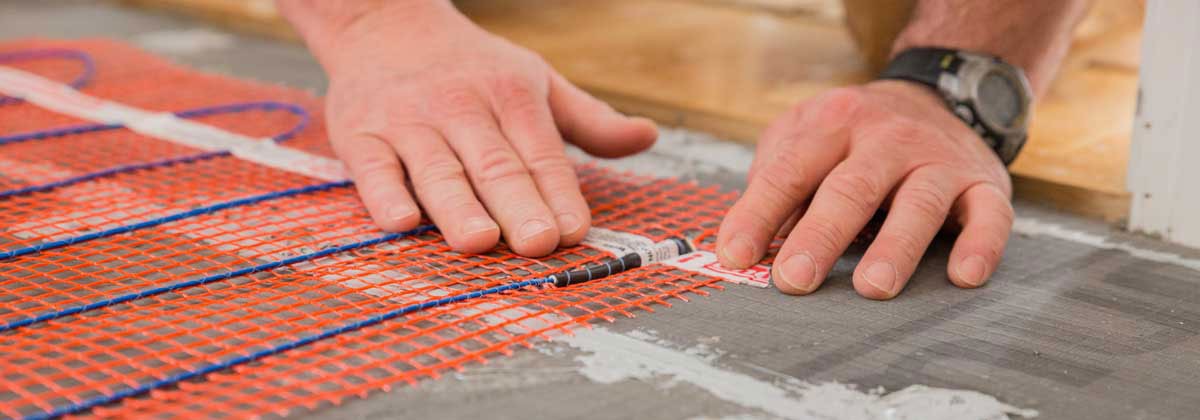
- Lay the heating mat.
Underfloor heating for tiled floors
You'll need to first put down an underlayer of Warmup Cement Coated insulation boards between the existing floor and the heating mats. First prime your substrate, then spread a generous coating of flexible tile adhesive with a flooring trowel. Lay the insulation boards like bricks so that they form staggered joints, and press down firmly. The insulation boards can be cut to fit around fixtures using a utility knife. When placing insulation boards on top of wooden floors, insert screws at 300mm to prevent movement. For wet areas, seal the joints with waterproof tape. Warmup's mat system has a self-adhesive backing which fixes it to the insulation boards, making this a very easy part of the process.
Underfloor heating for tiled floors
Warmup Foil Heater: Is laid on top of Warmup Insulated Underlay, a thin polystyrene insulation barrier that reflects the heat upwards, and improves the floor heating system efficiency. Foil aluminium tape is included in the pack, which is adhered across the mat strips to cover any exposed wires and to connect mat strips, to create a continuous earth grid.
Do's and don'ts when laying underfloor heating mats
When laying either of the Warmup products, the four points to remember are:
- Do: If you are using more than one pack of heating mat, make sure the power cable for each reaches the electrical connection, before you start fixing them to the floor them.
- Don’t run heating mats under fixtures
- Don’t allow heating wires to cross.
- Don’t cut the wires.
Both systems use a floor sensor to monitor the exact temperature of the floor. This is placed at least 300mm into the heated area and equidistant between two heating wires. You may want to chisel a channel into the subfloor so the sensor sits flush with the heating mat.
Connect thermostat and floor probe to the system. This is where the electrician comes in.
Lay the flooring over your newly-installed underfloor heating, then sit back, relax and enjoy a cosy, efficient home.
Things to note
- For tiles, check that the adhesive and grout is suitable for underfloor heating. Lay as normal. Don’t use the underfloor heating to speed up the drying process. Leave the floor to cure for at least seven days, before turning the underfloor heating on.
- When installing under carpets leave a 300mm gap between the Warmup foil heating system and wall for carpet stretcher and gripper rod installation.
World of Tiles is the exclusive distributor of Warmup electric underfloor heating systems and accessories in Ireland. For more information on heated floors, visit Warmup.


